Caramelized Onions 101: Pantry Staples for Savory-Sweet Flavor
There are few ingredients that can transform a dish quite like caramelized onions. What begins as a humble, pungent allium, often bringing tears to your eyes, undergoes a miraculous metamorphosis through slow, gentle heat. The result is a deeply savory, intensely sweet, golden-brown confit that elevates everything it touches. From gourmet burgers and sophisticated tarts to comforting grilled cheese and rich French onion soup, the rich, complex flavor of caramelized onions is a culinary superpower. And the best part? Learning
how to caramelize onions is far simpler than you might imagine, requiring just a few basic pantry staples and a touch of patience.
This comprehensive guide will demystify the process, turning you into a caramelized onion connoisseur. We’ll delve into the science, the essential ingredients you likely already possess, and a step-by-step method for achieving that perfect savory-sweet balance right on your stovetop. Prepare to unlock a world of flavor!
The Culinary Alchemy: What Makes Onions Caramelize?
Before we dive into the practical steps of
how to caramelize onions, let's understand the magic at play. All vegetables and fruits naturally contain sugars. Onions, in particular, are rich in these compounds, along with sulfur-containing molecules that give them their characteristic pungency when raw.
When onions are cooked slowly over low heat, two primary chemical reactions occur:
1.
Caramelization: This is the process where the natural sugars in the onions begin to break down and oxidize, leading to the development of new flavor compounds and a beautiful golden-brown color. This reaction is responsible for the deep sweetness.
2.
Maillard Reaction: Often occurring simultaneously with caramelization, the Maillard reaction is a complex chemical process between amino acids and reducing sugars. It contributes to the savory, umami-rich notes and further enhances the browning.
As the onions cook, their cellular structure also breaks down, releasing moisture and softening their texture. The tear-inducing sulfuric compounds evaporate, leaving behind only the concentrated sweetness and savory depth. This slow transformation is key – it's why raw onions are sharp and spicy, while caramelized onions are mellow, sweet, and utterly irresistible. The process takes time, typically 45 minutes to an hour, but the active cooking time is minimal, allowing you to enjoy other kitchen tasks while the onions work their magic.
Gathering Your Essentials: Pantry Staples for Perfect Caramelized Onions
One of the most appealing aspects of making caramelized onions is that you don't need exotic ingredients. Everything required is likely already in your kitchen.
*
Onions: The Star of the Show
Any type of onion can be caramelized, but some varieties are better suited than others.
*
Yellow Onions: These are the classic choice and a fantastic all-rounder. They have a good balance of sugar and sulfur, caramelizing beautifully to a deep, rich flavor.
*
White Onions: Slightly milder than yellow, they also caramelize well, yielding a softer sweetness.
*
Red Onions: These will produce a slightly less intensely sweet but more robust, almost fruity caramelized flavor with a beautiful reddish hue. They're excellent for specific applications like burgers or tarts where you want that color and a bolder onion presence.
* *Quantity:* For a standard large skillet, 2-3 medium to large onions (about 2-3 pounds) are ideal. Remember, onions shrink considerably during caramelization, so it's always wise to cook more than you think you'll need!
*
Cooking Fat: The Flavor Conductor
This is a critical component for both preventing sticking and developing flavor.
*
Olive Oil: A great choice for its heat tolerance and fruity notes. It's especially recommended for beginners as it's less prone to burning than butter.
*
Unsalted Butter: Adds a rich, creamy, nutty flavor that many find irresistible. However, butter has a lower smoke point and can burn more easily.
*
The Ideal Combination: Many chefs, myself included, prefer a blend of both olive oil and unsalted butter. The oil helps stabilize the butter, allowing it to cook longer without burning, while still imparting that delicious buttery richness. Aim for 3-4 tablespoons of total fat for 2-3 onions.
*
Salt: The Flavor Enhancer
A pinch of salt, typically 1/2 to 1 teaspoon, is crucial. It not only seasons the onions but also helps draw out their moisture, which is essential for the slow cooking process.
*
A Splash of Acid (Optional, but Recommended!)
Adding a tablespoon of an acidic liquid towards the end of the cooking process can elevate your caramelized onions to new heights.
*
Red Wine Vinegar or Balsamic Vinegar: These add a lovely tang that cuts through the sweetness, balancing the flavors and adding depth.
*
Dry Red or White Wine: Similar to vinegar, wine deglazes the pan, adding complexity and a subtle fruity note.
This step is particularly useful for scraping up any delicious browned bits from the bottom of the pan, incorporating them back into the onions.
Mastering the Technique: Your Step-by-Step Guide on How to Caramelize Onions
Now, let's get down to the practical steps for
how to caramelize onions on your stovetop.
1.
Preparation is Key: Slice Your Onions Evenly
Peel your chosen onions and slice them thinly and uniformly. Consistency in thickness is vital for even cooking. Aim for about 1/8 to 1/4 inch thick slices. You can slice them into half-moons or rings, depending on your preference and the dish you plan to use them in. A mandoline can achieve perfect slices, but a sharp chef's knife works just as well with a steady hand.
2.
Heat the Pan and Add Fat
Choose a large, heavy-bottomed skillet or Dutch oven. A wider surface area allows more onions to be in contact with the heat, promoting even browning. Place the pan over medium heat and add your chosen cooking fat (oil, butter, or both). Once the fat is shimmering (or butter is melted and foamy), add the sliced onions and a good pinch of salt.
3.
The Initial Sauté: Softening and Releasing Moisture
Stir the onions well to coat them thoroughly with the fat and salt. Cook them, stirring occasionally, for about 10-15 minutes. During this phase, the onions will soften considerably, release a lot of their moisture, and begin to turn translucent. Don't rush this step – it's crucial for breaking down the onions before true caramelization begins.
4.
Lower the Heat: The "Low and Slow" Philosophy
Once the onions have softened and started to take on a pale golden hue, it's time to reduce the heat significantly. Drop it to medium-low or even low, depending on your stove. This is where the "low and slow" motto comes into play. The sugars in the onions require gentle, consistent heat to caramelize gradually. Cooking them over high heat will only lead to burning before they have a chance to sweeten and deepen in flavor. For a detailed, hour-by-hour breakdown, check out our guide on
Master Caramelized Onions: Easy Stovetop Method in 1 Hour.
5.
Stir and Be Patient: The Caramelization Process
Continue to cook the onions, stirring every 5-10 minutes. At this stage, you're not hovering, but checking in regularly to ensure even cooking and prevent sticking. You'll notice the onions gradually transforming:
* After 20-30 minutes: They'll be a deeper golden, starting to clump together.
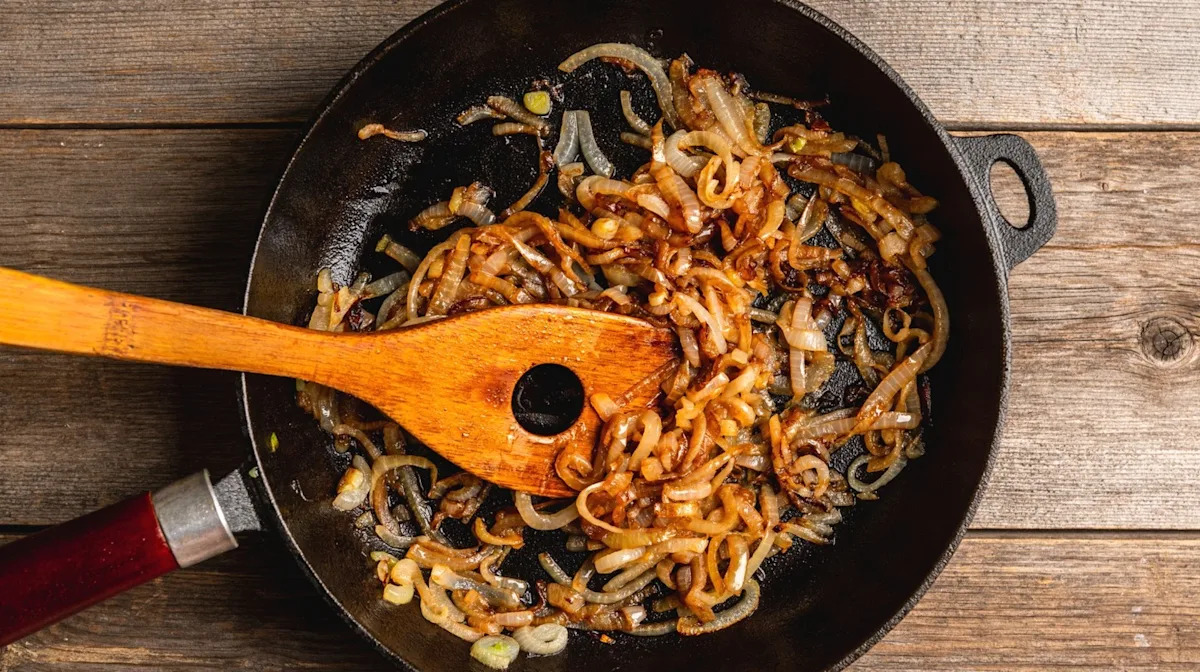
* After 30-45 minutes: They'll develop a rich, amber color and become incredibly soft and sweet.
* After 45-60 minutes: They'll reach a deep, glossy brown, almost jam-like consistency. This is the sweet spot for intensely flavored caramelized onions.
6.
Deglaze and Finish (Optional but Recommended)
If you notice any dark bits sticking to the bottom of the pan (often called *fond*), this is concentrated flavor! Towards the end of the cooking process, or if the onions seem a bit dry, pour in a tablespoon of red wine vinegar, balsamic vinegar, or dry wine. Stir well, scraping up any browned bits from the bottom of the pan. This deglazing step adds another layer of complexity and ensures all that delicious flavor is incorporated back into your onions. Cook for another minute or two until the liquid evaporates. And to truly understand the science behind the ideal cooking temperature, don't miss
Low & Slow: The Secret to Perfect Sweet Caramelized Onions.
Your perfectly caramelized onions are now ready to enjoy!
Troubleshooting Common Caramelization Challenges
Even seasoned cooks sometimes face challenges when trying to caramelize onions. Here are a few common issues and their solutions:
*
Burning Before Browning: This is almost always a sign that your heat is too high. Reduce the temperature immediately. If they've already started to burn significantly, it's often best to discard them and start over, as the burnt flavor will permeate the entire batch.
*
Not Browning Enough/Taking Forever: If your onions are just sitting there, steaming and not browning, your heat might be *too* low, or you might have too many onions for your pan, which causes them to steam rather than brown. Increase the heat slightly or cook in smaller batches if necessary. Patience is still key, but there's a difference between slow cooking and just stewing.
*
Sticking to the Pan: Ensure you're using enough cooking fat at the beginning. If sticking occurs mid-way, don't force them. A splash of water, broth, or your chosen acidic liquid (vinegar/wine) can help deglaze the pan and release the stuck bits without tearing the onions.
*
Too Much Moisture: Sometimes onions release a lot of water initially. Just keep cooking, stirring occasionally, and allow the moisture to evaporate before the browning truly begins. Don't cover the pan, as this traps steam and hinders caramelization.
Creative Ways to Enjoy Your Golden Goodness
Once you master
how to caramelize onions, you'll find endless applications for this versatile ingredient:
*
Burgers & Sandwiches: A quintessential topping for a gourmet touch.
*
Grilled Cheese: Elevate a simple grilled cheese to an indulgent meal.
*
Pizza & Flatbreads: Pair with goat cheese, bacon, or mushrooms.
*
Quiches & Tarts: A base for savory baked goods.
*
French Onion Soup: The cornerstone of this classic, comforting dish.
*
Dips: Mix into sour cream or cream cheese for a flavorful dip.
*
Pasta & Risotto: Adds a savory depth to vegetarian or meat dishes.
*
Omelets & Scrambles: A delightful breakfast or brunch addition.
*
Steak Topping: A rich accompaniment to grilled meats.
*
On Crostini: Simple, elegant appetizer with a smear of goat cheese.
Conclusion
Caramelized onions are a testament to the power of simple ingredients and patient cooking. They transform from sharp and assertive to incredibly sweet, savory, and wonderfully complex, all with just a few pantry staples and some gentle heat. While the process demands a little time, the hands-off nature and the unparalleled flavor payoff make it an incredibly rewarding culinary endeavor. Mastering
how to caramelize onions is a fundamental skill that will elevate your home cooking and impress anyone lucky enough to taste your creations. So, grab some onions, a pan, and prepare to embark on a delicious journey of savory-sweet perfection!