Low & Slow: The Secret to Perfect Sweet Caramelized Onions
Few ingredients possess the transformative power of perfectly caramelized onions. What begins as a pungent, tear-inducing bulb miraculously morphs into a deeply sweet, intensely savory, and utterly irresistible culinary delight. If you've ever wondered how to caramelize onions, you're in for a treat. This seemingly gourmet addition to dishes is far easier to achieve than you might imagine, requiring just a few pantry staples and a generous dose of patience. Caramelized onions elevate everything they touch – from a humble grilled cheese sandwich to a sophisticated quiche, a juicy burger, or even a comforting bowl of French onion soup. They add a layer of complex flavor that can turn an ordinary meal into something truly special. Forget the myth that caramelizing onions is an arduous kitchen task; it’s a simple stovetop process that rewards your minimal effort with maximum flavor.The Magic Behind the Transformation: From Pungent to Palate-Pleasing
The journey from a raw, sharp onion to a sweet, golden masterpiece is a fascinating one, rooted in basic culinary science. Onions, like all vegetables and fruits, contain natural sugars. When these sugars are subjected to prolonged, gentle heat, they undergo a chemical reaction known as caramelization. This process breaks down the complex sugars into simpler, sweeter compounds, while also developing hundreds of new flavor molecules. Simultaneously, the slow cooking process mellows the onion's sharp, sulfurous compounds, which are responsible for their biting taste and the tears they often induce. These volatile gases dissipate, leaving behind only the rich, sweet essence of the onion. This dual transformation makes onions an ideal candidate for caramelization, unlocking a depth of flavor that is simply unparalleled.The Essential Ingredients and Tools for Caramelized Onions
Before you embark on your caramelization journey, let's gather the handful of ingredients and basic tools you'll need. The beauty of this recipe lies in its simplicity – you likely have everything on hand already. To truly master the art, consider exploring Caramelized Onions 101: Pantry Staples for Savory-Sweet Flavor for deeper insights into ingredient selection.Choosing Your Onions
- Yellow Onions: These are the workhorse of the onion family and my go-to for caramelizing. They have a good balance of sugar and moisture, yielding a classic sweet and savory result.
- White Onions: Slightly milder than yellow, white onions also caramelize beautifully, offering a similar, slightly less robust sweetness.
- Red Onions: While they lose some of their vibrant color during cooking, red onions caramelize into a unique, almost jammy sweetness with a hint of their original peppery notes. They're fantastic for specific applications like topping goat cheese tarts.
Aim for 2-3 medium to large onions for a standard skillet. Remember, onions shrink significantly during caramelization, so it's always wise to start with more than you think you'll need.
The Perfect Fat: Butter, Oil, or Both?
The choice of cooking fat significantly impacts the final flavor and cooking process:
- Olive Oil: A great choice, especially for beginners or if you prefer a dairy-free option. Olive oil tolerates heat well and imparts a subtle, fruity note.
- Unsalted Butter: Butter brings an unparalleled richness and nutty depth of flavor that is simply divine. However, butter has a lower smoke point and can burn easily if not monitored.
- The Ideal Combination: For the best of both worlds, use a mix of olive oil and butter. The olive oil helps stabilize the butter, allowing it to withstand higher initial heat without burning, while still providing that signature rich flavor. I recommend starting with 2 tablespoons of olive oil and 1-2 tablespoons of butter for 2-3 onions.
A Pinch of Salt and a Splash of Vinegar or Wine
- Salt: A pinch of salt draws out moisture from the onions, helping them soften and brown more effectively. It also enhances their natural sweetness.
- Vinegar or Wine: This is an optional but highly recommended secret weapon. A tablespoon of red wine vinegar, balsamic vinegar, or a dry red or white wine added towards the end of the cooking process does wonders. It helps to deglaze the pan, scraping up any delicious browned bits (fond) stuck to the bottom, and adds a layer of acidity and complexity that brightens and deepens the overall flavor profile.
Essential Tools
A heavy-bottomed skillet or Dutch oven is crucial. Cast iron or stainless steel works best as they retain heat evenly, preventing scorching. A sturdy wooden spoon or heat-resistant spatula for stirring completes your arsenal.
Mastering the "Low & Slow" Technique for Perfect Caramelized Onions
The absolute secret to perfect sweet caramelized onions lies in patience and understanding the "low and slow" cooking philosophy. Rushing the process will inevitably lead to burnt, bitter onions rather than the coveted golden-brown, melt-in-your-mouth sweetness. This is the heart of how to caramelize onions properly. For a detailed walkthrough, you can also refer to Master Caramelized Onions: Easy Stovetop Method in 1 Hour.Preparation is Key
- Slice Uniformly: Peel your onions and slice them into uniform 1/8 to 1/4-inch thick half-moons. Consistency in slicing ensures that all the onions cook evenly. Thinner slices will caramelize faster, while thicker slices will retain more texture.
- Heat the Pan: Place your heavy-bottomed skillet over medium heat. Add your chosen fat (oil, butter, or both) and allow it to melt and shimmer.
- Add Onions and Salt: Toss the sliced onions into the hot pan. Don't overcrowd the pan; if you're making a large batch, consider working in batches or using a very large pot. Add a good pinch of salt.
The Slow Cooking Process
This is where the magic happens and where patience truly pays off.
- Initial Softening (Medium Heat, 5-10 minutes): Stir the onions frequently during this initial phase. They will begin to soften and release their moisture. The goal here isn't browning yet, but rather to get them translucent and tender.
- Reduce Heat & Begin Browning (Medium-Low to Low, 30-45 minutes): Once the onions have softened and started to take on a pale golden hue, reduce the heat to medium-low or even low. This is critical. The sugars in the onions need time and gentle heat to transform without burning. High heat will simply char the outsides before the interiors have a chance to sweeten.
- Stir Periodically: You don't need to hover constantly, but stir every 5-10 minutes. This prevents sticking and ensures even browning. As the onions release more liquid and start to stick to the bottom, those browned bits (fond) are flavor gold. Don't scrape them off forcefully yet.
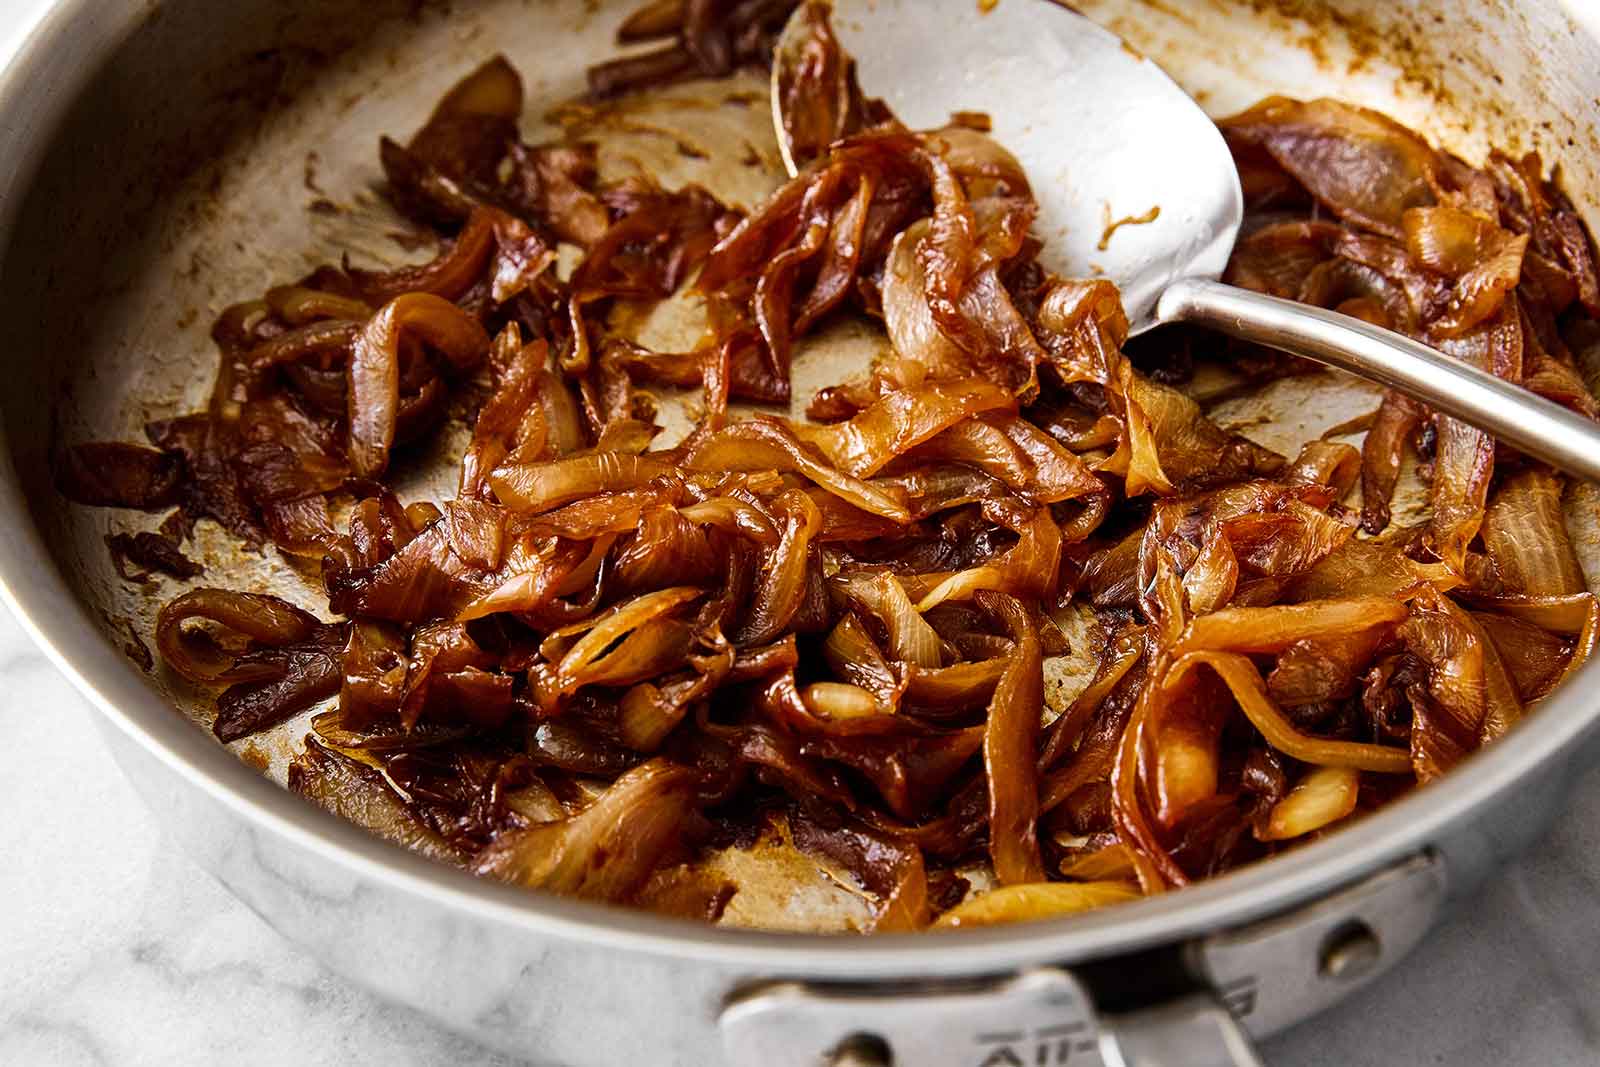
- Deglaze and Deepen Flavor (Last 10-15 minutes): As the onions turn a rich, golden-brown and become very tender, they will likely start sticking to the pan more. This is the perfect time to add your splash of vinegar or wine. Pour it into the pan and use your spatula to scrape up all those delicious browned bits from the bottom. This process, called deglazing, adds incredible depth of flavor and ensures no flavor is left behind. Continue to cook, stirring, until the liquid has evaporated and the onions are deeply caramelized, a rich mahogany brown, and jammy in texture.
Judging Doneness
Perfectly caramelized onions will be significantly reduced in volume, have a uniform deep golden to rich brown color, and possess a soft, melt-in-your-mouth texture. Their aroma will be intensely sweet and savory, a far cry from their raw state.
Beyond the Burger: Creative Ways to Use Caramelized Onions
Once you've mastered how to caramelize onions, you'll find countless ways to incorporate these savory-sweet gems into your cooking. They are incredibly versatile and can elevate nearly any dish.- Burgers & Sandwiches: The classic pairing. Add them to gourmet burgers, reubens, or even a simple turkey sandwich for an instant upgrade.
- Grilled Cheese: Transform a basic grilled cheese into an adult-worthy meal by spreading a layer of caramelized onions between the cheese slices.
- Pizzas & Flatbreads: Use them as a topping with goat cheese, bacon, or roasted vegetables.
- Quiches & Tarts: A perfect base for savory tarts, adding a deep, sweet foundation.
- French Onion Soup: The essential ingredient! Caramelized onions are the soul of this hearty soup.
- Dips: Mix them into creamy dips for an extra layer of flavor.
- Omelets & Scrambled Eggs: A simple way to elevate breakfast or brunch.
- Steak & Roasts: Serve as a flavorful accompaniment to grilled meats.
Storage Tip: Caramelized onions keep well in an airtight container in the refrigerator for up to 5 days. You can also freeze them in small portions for several months, making it easy to have this delicious ingredient on hand whenever inspiration strikes.
