Unlock a depth of flavor that transforms ordinary dishes into extraordinary culinary experiences: we're talking about caramelized onions. Far from their pungent, raw state, these golden strands of sweetness offer a complex savory-sweetness that elevates everything from gourmet burgers to elegant tarts. While often perceived as a daunting, time-consuming task, mastering the art of caramelizing onions on your stovetop is simpler than you think, and in just about an hour, you can achieve professional-level results right in your own kitchen.
Imagine a world where your grilled cheese sandwich is no longer just cheese and bread, but a rich symphony of creamy cheddar and deep, sweet onion notes. Or a burger that boasts not just a patty, but a tender layer of glistening, browned onions adding an unparalleled umami punch. This isn't just a fancy restaurant trick; it's an accessible technique that uses ingredients you likely already have on hand. Get ready to learn precisely how to caramelize onions with our easy-to-follow stovetop method, promising mouthwatering flavor in about 60 minutes.
The Culinary Magic of Caramelized Onions
What exactly happens when an onion caramelizes? It's a beautiful scientific transformation. Onions are naturally rich in sugars. When subjected to low and slow heat, these sugars undergo a process called caramelization, breaking down and browning. This process strips away the sharp, sulfurous compounds that give raw onions their bite and replaces them with a profound, nutty, and intensely sweet flavor profile. The result is a soft, jam-like texture and a deep golden-brown hue that signifies pure deliciousness.
This savory-sweet addition is incredibly versatile. It can turn humble ingredients into gourmet delights. Consider:
- Burgers and Sandwiches: A staple topping that adds gourmet flair.
- Quiches and Tarts: A foundational layer of flavor for savory baked goods.
- Pizzas and Flatbreads: A sweet counterpoint to salty cheeses and meats.
- Dips and Spreads: The star ingredient in classic French onion dip.
- Soups and Sauces: The base for a rich French onion soup or a finishing touch for gravies.
- Grilled Cheese: Transforms a simple comfort food into something extraordinary.
Once you experience the depth of flavor these humble onions can provide, you'll wonder how you ever cooked without them.
Gathering Your Essentials: Ingredients and Tools
One of the beauties of learning how to caramelize onions is that it requires very few specialized ingredients or tools. You likely have everything you need in your pantry and kitchen right now. For more ideas on what kitchen staples are best for this, check out our guide on Caramelized Onions 101: Pantry Staples for Savory-Sweet Flavor.
Choosing Your Onions
- Yellow Onions: These are the workhorse of the onion world and an excellent choice for caramelizing. They offer a good balance of sugar content and structure.
- White Onions: Slightly milder than yellow, they also caramelize beautifully.
- Red (Purple) Onions: While they lose some of their vibrant color during cooking, red onions offer a slightly different, often fruitier sweetness when caramelized. They work wonderfully in dishes where their subtle sweetness can shine.
The quantity depends on your skillet size and desired yield. Two to three medium onions are typically perfect for a large 10-12 inch skillet.
The Perfect Fat: Oil, Butter, or Both?
This is a common question, and the answer is nuanced:
- Olive Oil: A great choice for its high smoke point and mild flavor. It tolerates heat well, making it a reliable option, especially if you're a beginner.
- Unsalted Butter: Imparts a distinctively rich, creamy flavor that complements the sweetness of the onions beautifully. However, butter has a lower smoke point and can burn more easily.
- Combination (Recommended): For the best of both worlds, use a mix of olive oil and unsalted butter. The oil helps stabilize the butter, preventing it from burning while still allowing it to infuse its rich flavor. Aim for 3-4 tablespoons of total fat for 2-3 onions.
The Finishing Touch: Salt and Vinegar/Wine
- Salt: A pinch of salt at the beginning helps draw out moisture from the onions, aiding in the caramelization process and enhancing flavor.
- Vinegar or Wine: A splash (about 1 tablespoon) of red wine vinegar, balsamic vinegar, or even dry red or white wine is an optional but highly recommended addition. Added near the end, it deglazes the pan, scraping up any flavorful browned bits stuck to the bottom, and adds a layer of bright acidity that balances the onions' sweetness.
Essential Tools
- Large, Heavy-Bottomed Skillet: A wide, heavy-bottomed pan (cast iron or stainless steel works best) provides even heat distribution, crucial for slow and consistent cooking. Avoid non-stick if possible, as the fond (browned bits) are where much of the flavor develops.
- Spatula or Wooden Spoon: For stirring.
Mastering the Method: Your Step-by-Step Guide to Perfect Caramelization
Now, let's dive into exactly how to caramelize onions on your stovetop in about an hour. Remember, patience is your most valuable ingredient.
1. Prepare Your Onions
Peel your chosen onions and slice them thinly and uniformly. Consistency in slicing ensures even cooking. You can slice them into rings or half-moons; just aim for a similar thickness (about 1/8 to 1/4 inch).
2. Heat the Pan and Add Fat
Place your large, heavy-bottomed skillet over medium heat. Once hot, add your chosen fat(s) – the combination of olive oil and butter is ideal. Allow the butter to melt completely and foam slightly.
3. Introduce the Onions and Salt
Add the sliced onions to the hot skillet. It might look like a lot, but they will cook down significantly. Add a generous pinch of salt. Stir well to coat the onions evenly with the fat.
4. Begin the Slow Cook: Medium Heat
Cook the onions, stirring every few minutes, for about 10-15 minutes. During this initial phase, the onions will soften, release moisture, and start to turn translucent. Don't rush this part; allow them to wilt down.
5. Reduce Heat & Embrace the "Low & Slow"
Once the onions have softened and begun to take on a pale golden hue, reduce the heat to medium-low or even low. This is the critical stage where the magic happens. Continue to cook, stirring every 5-10 minutes. The goal is to allow the sugars to slowly brown without burning. If you notice them browning too quickly, reduce the heat further. If they seem to be stewing rather than browning, increase the heat slightly. This phase will take the bulk of your hour, roughly 30-40 minutes.
6. Deglaze and Deepen Color (Optional but Recommended)
As the onions continue to cook and deepen in color, you might notice some dark brown bits sticking to the bottom of the pan – this is known as "fond" and it's pure flavor! If the pan looks dry or bits are sticking stubbornly, add a splash (1-2 tablespoons) of water, broth, or your chosen vinegar/wine. Use your spatula to scrape up all those flavorful bits. This process, called deglazing, prevents burning and incorporates that concentrated flavor back into the onions. Repeat this process as needed throughout the last 15-20 minutes of cooking.
7. Achieve Golden Perfection
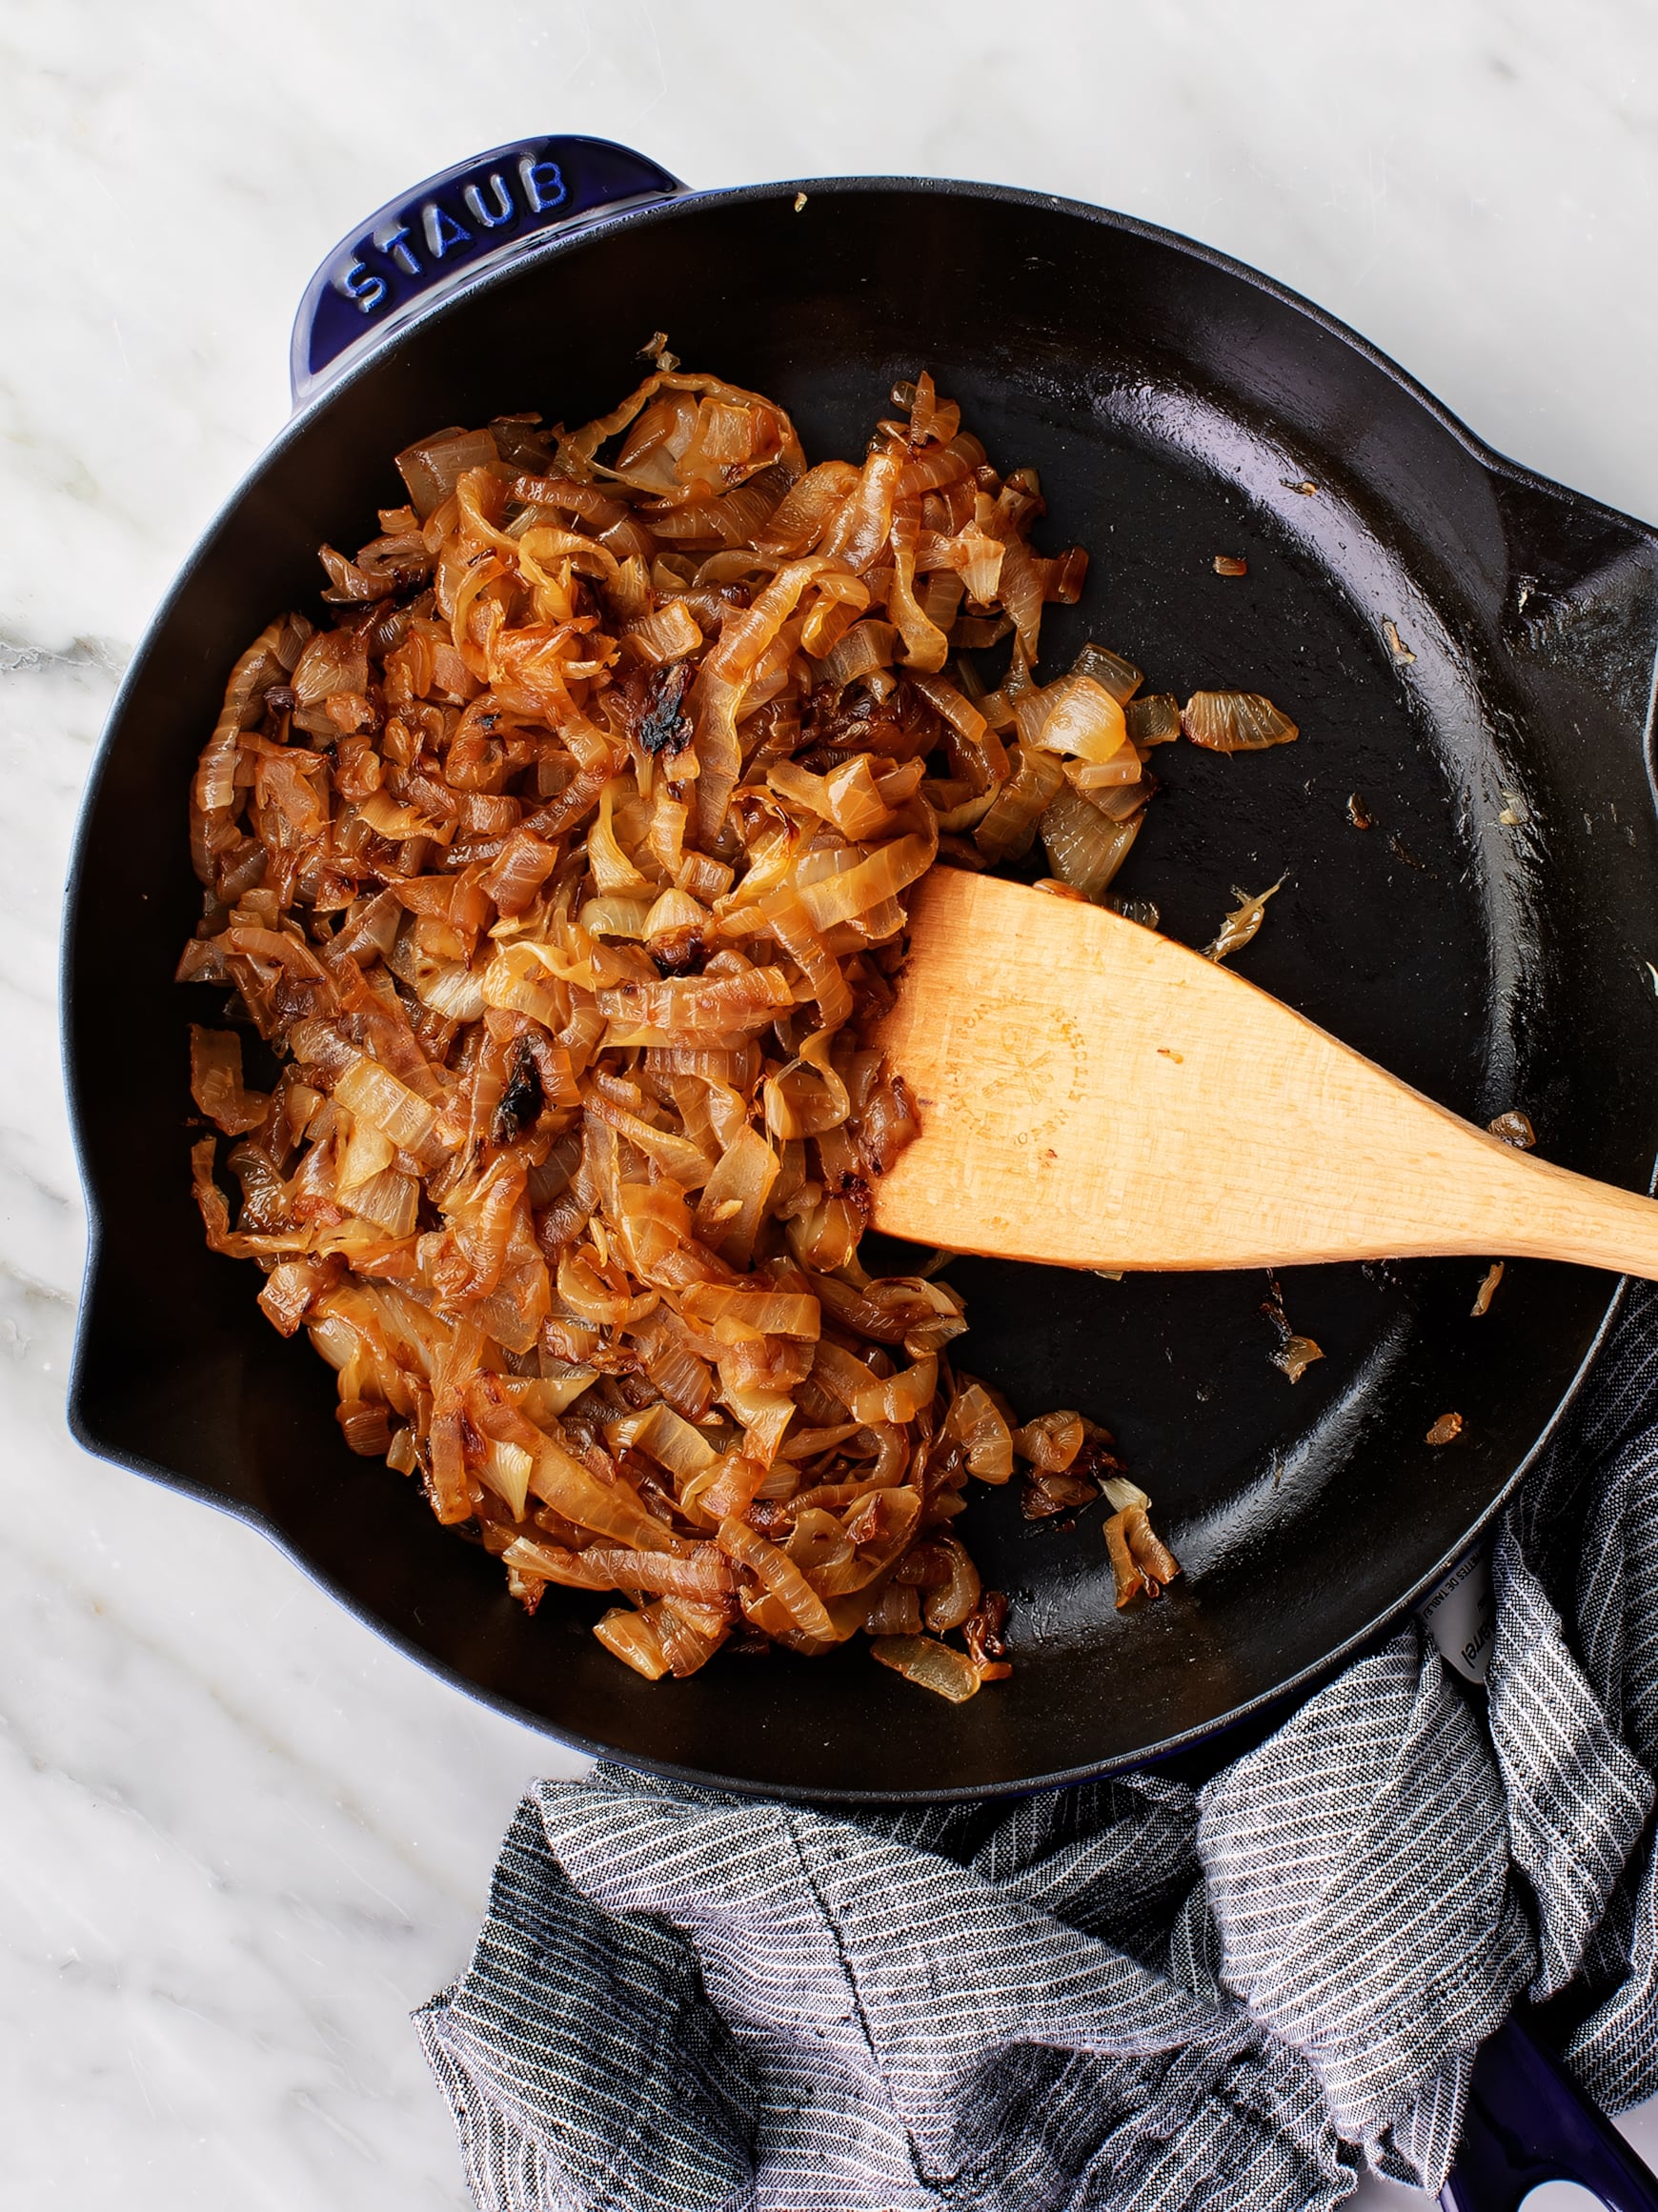
Continue cooking until the onions are a deep, even golden-brown, soft, jam-like, and intensely sweet. The entire process, from start to finish, should take between 45 minutes to 1 hour, depending on your stove, pan, and desired level of caramelization. Taste and adjust seasoning if necessary.
Pro Tips for Flawless Caramelized Onions
- Don't Overcrowd the Pan: Give your onions space. If you're caramelizing a large batch, consider working in two separate pans or batches, or opt for a larger skillet. Overcrowding steams the onions instead of browning them.
- Patience is a Virtue: The phrase "low and slow" truly applies here. Resist the urge to crank up the heat. High heat leads to burnt, bitter onions, not caramelized sweetness.
- Stirring Frequency: While you don't need to hover, regular stirring prevents sticking and promotes even browning. As they get darker, you may need to stir a little more often.
- Adjust Heat as Needed: Every stovetop is different. Pay attention to your onions and adjust the heat up or down as necessary to maintain a steady, gentle sizzle without burning.
- Storage: Once cooled, caramelized onions can be stored in an airtight container in the refrigerator for up to 5-7 days, or frozen in individual portions for several months. They're excellent for meal prep!
Conclusion: Your New Culinary Superpower
Learning how to caramelize onions is more than just a recipe; it's acquiring a fundamental culinary skill that will unlock a world of flavor in your kitchen. This simple stovetop method, requiring just a few pantry staples and about an hour of patient cooking, yields a versatile ingredient that can elevate countless dishes. From the initial slice to the final deglaze, each step contributes to the profound, sweet, and savory transformation of the humble onion. Go ahead, give it a try. Your taste buds—and your guests—will thank you for this delightful addition to your culinary repertoire.
